Procedural generation of building interiors (part 5)
This post follows on from part 1 through part 4.
Since I last posted I’ve started a new job, which has left me with less time to work on Subveillance. That said, I keep making progress and will keep posting, if perhaps a little slower than earlier in the year.
The next job at hand was to take all the nicely sized rooms in the map and group them into zones through which the player could progress.
Back in part 3 I described how I created a special starting room as part of the hallway generation algorithm. If it really was my starting room for a level, it made sense to create the first zone around this point and then expand outwards into the rest of the building.
I reused the same flood-fill approach from the hallway generation algorithm to explore the map. This time I limited the maximum distance travelled from the starting point to 10 squares. Every room that touched one of the explored hallway squares was marked as being in the first zone.
Having identified the first zone I was left with an interesting problem. I now had two directions to explore the hallways. The way I solved this was to put all the starting points for new zones into a list and work through the list until no more starting points remained.
When the 10 square limit was reached on the current zone, the newly discovered starting point was added to the bottom of the list. Then I took the next starting point from the top of the list. This first-in-first-out approach lead to a “breadth first” discovery of new zones.

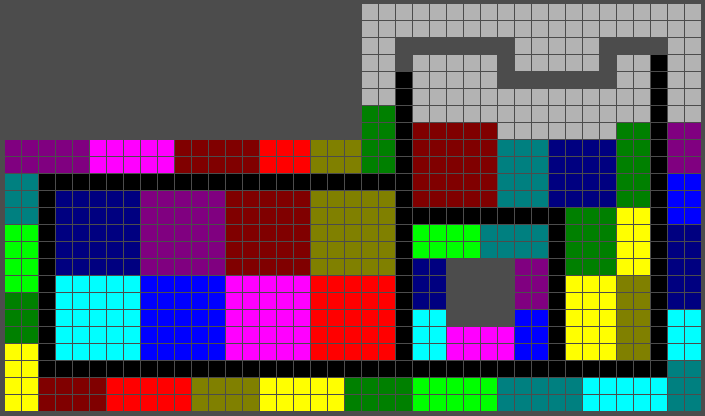
This screenshot shows each zone in a different colour, with hallway zone starting squares in white, and zone “exit” squares in light grey.
The screenshot also nicely highlights a problem that I hadn’t considered until testing threw up this variation. My intention for levels was to create something like a locked door in the exit square of each zone. The zone puzzle would be to unlock this door. However, as illustrated, some hallways could be wider than a single square, making them unsuitable. I needed a single-square choke point.
After some head scratching the solution I chose was to allow the 10 square limit to be extended until a viable exit square was found that could form the desired choke point.
Initially I took a naive approach of extending the search limit to be the same for all paths.
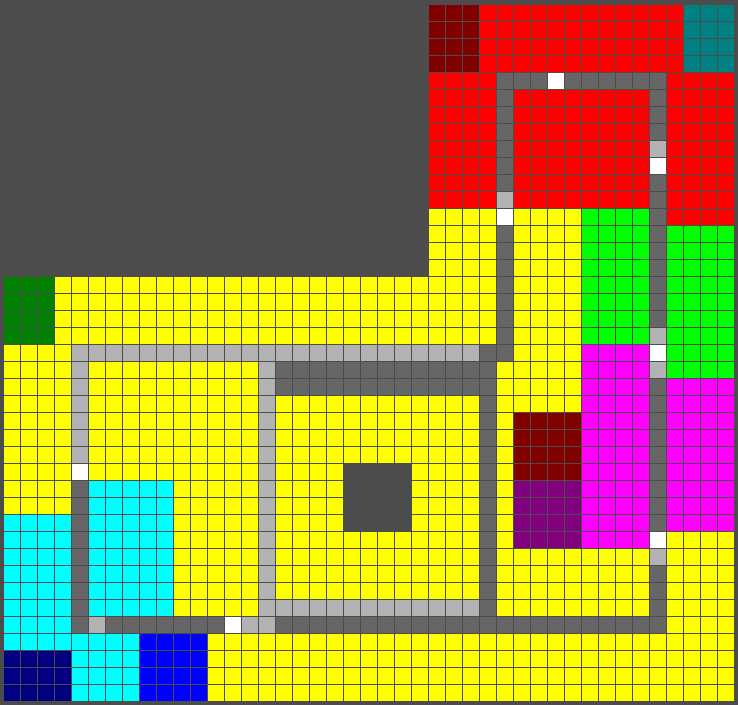
However, I had not accounted properly for branches in hallways, each needing its own exit. This “global” extension of the limit, effectively requiring all paths from the starting point to an exit to be the same length lead to some huge zones.
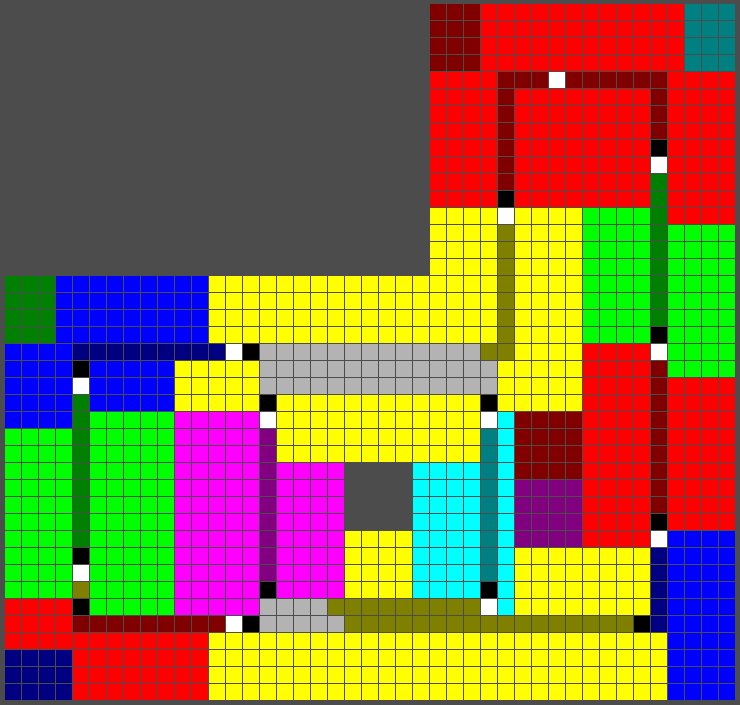
By allowing each “over limit” zone exit to be determined independently, regardless of distance from the starting point, overall zone size was brought back to a reasonable level.

In this screenshot I modified the hallway square colours to help me visualise the algorithm more accurately. Zone starting points are still shown in white, but exits are now in black, with “over limit” squares in light grey.
You can also see the effect of hallway loops creating small zones as new zones encounter earlier zones.
Overall I was very pleased with the variation in zone sizes these two edge cases created. However, it now looked like I might have a new problem of zones with no rooms at all (bottom left).
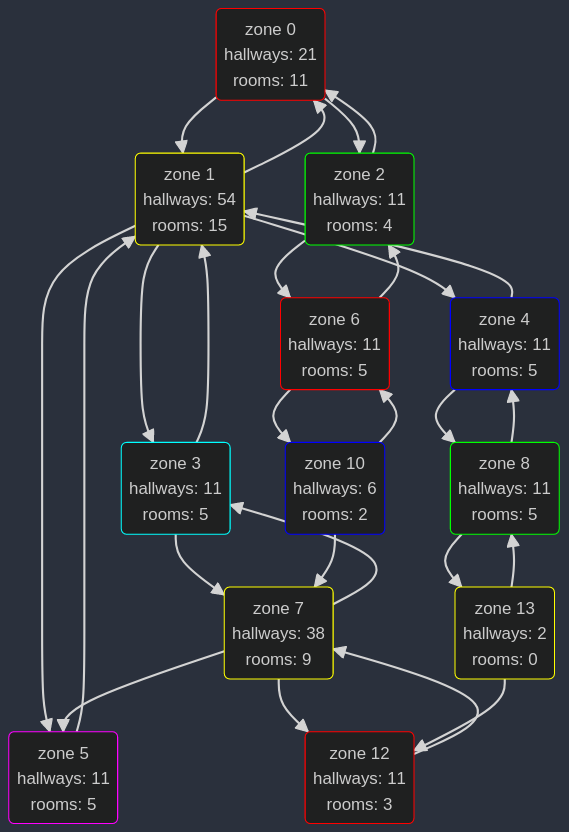
To investigate this further I decided to collect information about the zones and their rooms as the algorithm walked the map. I modified the code to build up a tree structure in memory that recorded which rooms were in a zone and how the zones connected to each other.
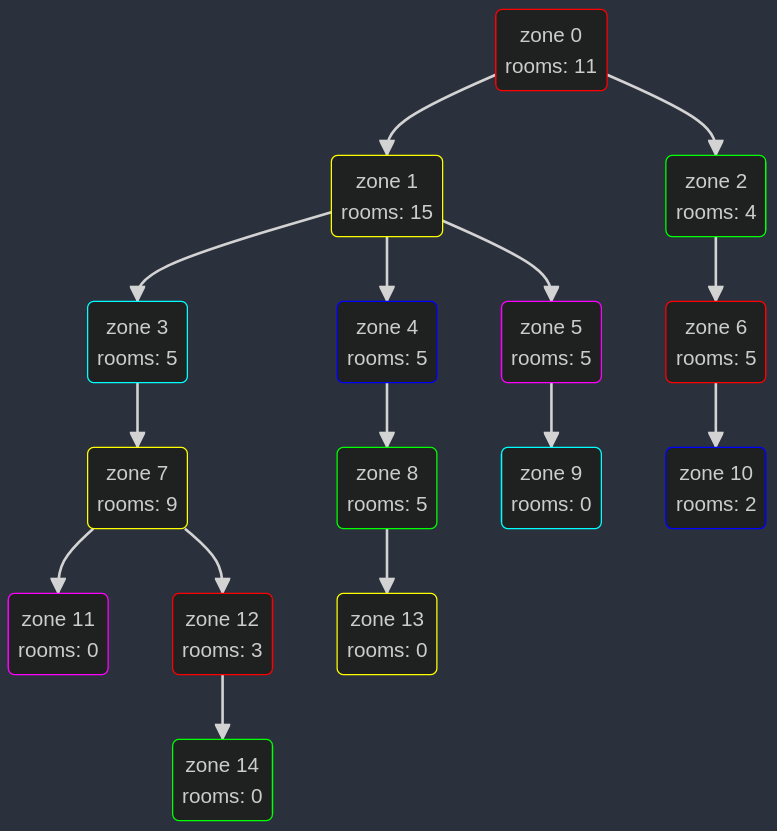
By outputting the tree as marked-up text I was able to use Mermaid to visually inspect the tree without having to write any complex display code. This was a debug aid rather than part of the prototype code itself, and did indeed confirmed that there were “empty” zones with hallways but no rooms. I was confident that that particular problem would be easy to solve by creating a zone-merging pass for the algorithm, and so decided to leave that for the production version of the game.
Now that I had more structured data about the map it was possible to get more sophisticated, such as marking the hallways in a the same hue as the rooms. This made visualising the zones easier.
The final piece I wanted to put in place was to make the connections between the zones bidirectional and allow this to be visualised in the Mermaid diagrams. This would undoubtedly be useful when calculating where the “final boss” zone was relative to the starting zone.
With comprehensive map data in place the next step would be to turn the map into a player-scale level. That will be the topic of part 6.
Leave a comment
Log in with itch.io to leave a comment.